Sccm2012 R2 Operating System deployment Guide Windows 8.1
Hi, today I’ll post the mega guide of deployment of Windows 8.1 on a SCCM2012 R2 with MDT2013 Integrated


Prerequisites:
- MDT 2013 Integration and ADK integration on SCCM2012 R2
- SCCM 2012 R2
- SUP ROLE Installed and configured
- DP With PXE enabled
- Sccm2012 R2 basic knowledge
Index
- The Wim images and structure
- Integrate WIM and updates on the image into SCCM2012 R2
- Offline servicing image
- The Boot Image (MDT integration)
- Creating the boot image
- Adding Boot image drivers
- Configuring Boot image parameters
- Create and customize MDT task sequence
- Customsettings.ini
- Unattend.xml
- The Udi wizard config
- Programs on MDT
- Customize Drivers
- Mdt optimization
1. The Wim Image and structure
The wim extension is a compression format that we use to compress data , we can use in different scenarios like :
- Security copy of a drive
- Personalized images ( cloned )
- Deployment images ( Sysprepped )
- Boot Images ( Win Pe enviroment , users windows kernel minimal interface used for OS deployments )
- Online Servicing : Adding Framework 3.5 ,Activating features and roles ( Windows Server ) also is used to remove features and roles
- Offline servicing : Activating Features in the WIM image ( ) stored in space
The Wim Structure

WIM File Layout
- WIM Header—Defines the content of the .wim file, including memory location of key resources (metadata resource, lookup table, XML data), and various .wim file attributes (version, size, compression type).
- File Resources—A series of packages that contain captured data, such as source files.
- Metadata Resource—Contains information about the files that you are capturing, including directory structure and file attributes. There is one metadata resource for each image in a .wim file.
- Lookup Table—Contains the memory location of resource files in the .wim file.
- XML Data—Contains additional data about the image.
- Integrity Table—Contains security hash information that is used to verify an image’s integrity during an apply operation
2.Integrate WIM and updates on the image into SCCM2012 R2
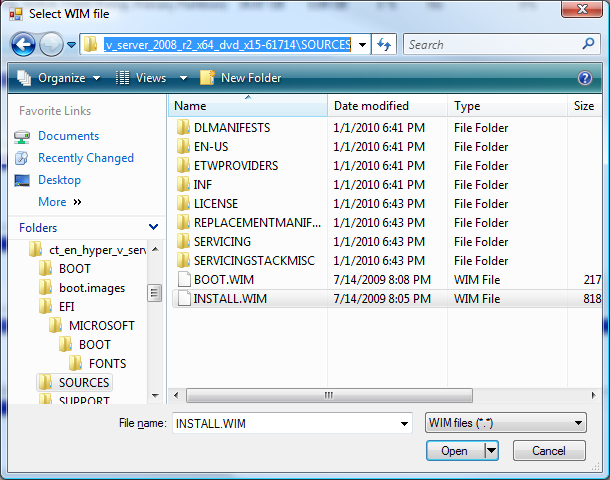
The first we need to create the image is to search install.wim on our Windows 8/8.1 CD / DVD, this is the base of our deployment , this often is placed on Sources folder , is the basic windows installation package
Integrating The Windows Updates
Go to in the console and “Operating System images level” on SCCM2012 Console 
Select the Install wim from the source DVD

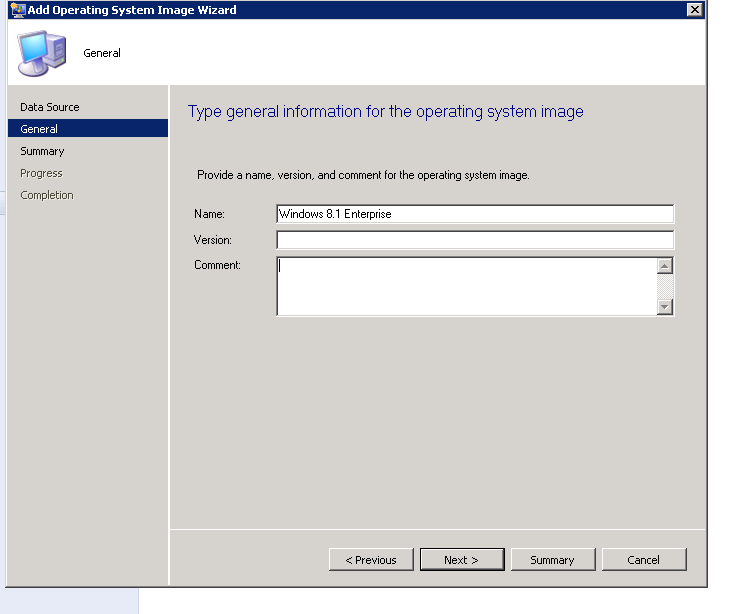
Enter the name , version and comment to the image
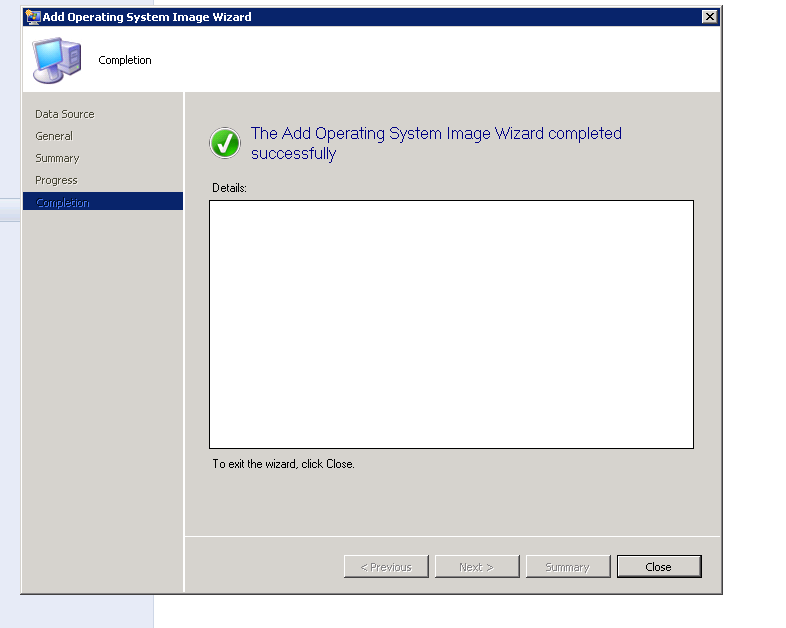
Complete the operation
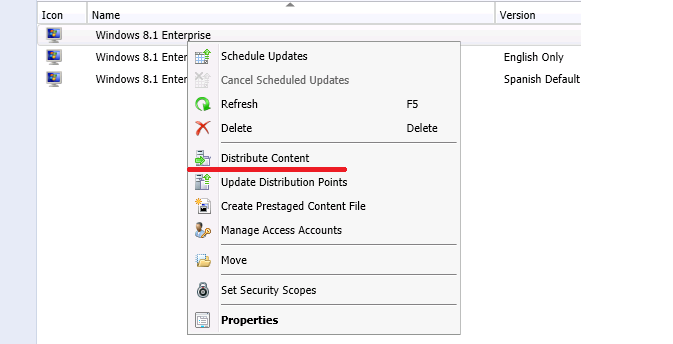
Once finished then , distribute the package to the distribution points
Integrating the updates on the WIM image
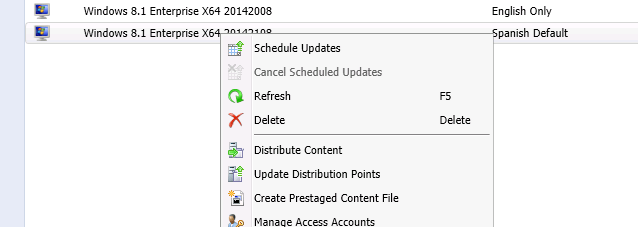
Now it’s time to schedule the integration of the updates on the image that we added into our system , for that we must right click the image on the console and go to “schedule updates” ( For this step you must have activated the SUP role and Updates running )
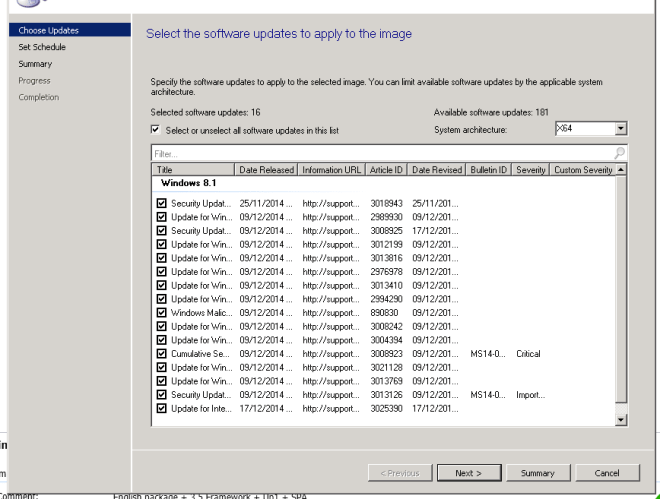
Select the available updates and click next
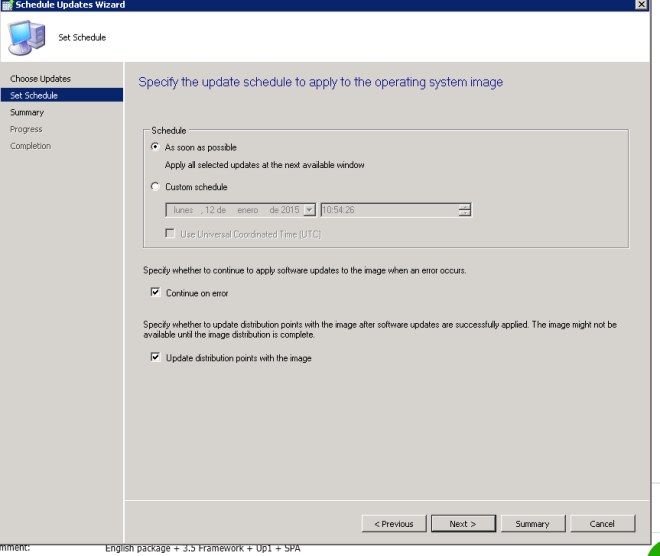
Check as soon as possible or custom schedule , note that the image won’t ve available when the servicing is finished because will automatically redistribute to the distribution points
Complete the action
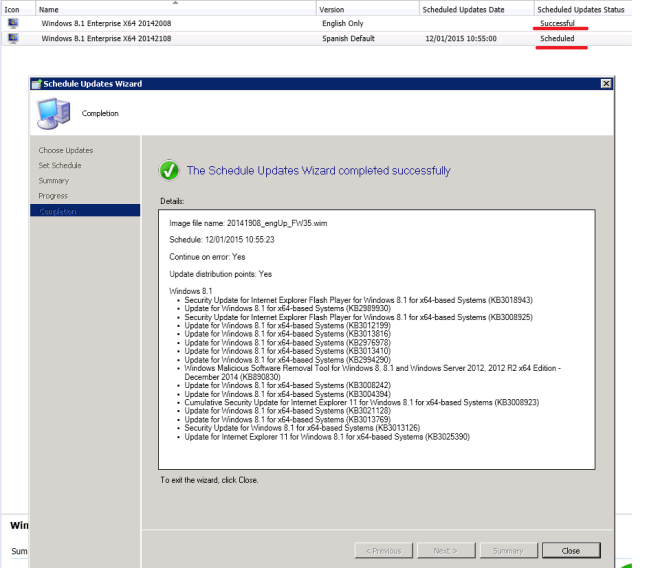
As you can see , on the schedule column , there is a status “Scheduled” , when the process is finished you will see this status changed to “successful “ , you can monitor the process on the
To see what’s happening at the background, you need to have 2 files opened wsyncmgr.logand WCM.log file. Below is the screenshot of the wsyncmgr.log file and we can see that the WSUS is synchronizing the categories and updates.
Once we ave the image stored in our location , if we need to make changes in offline servicing ( for example activate Framework 3.5 or other features ) .
With this command you can mount the image :
dism /mount-wim /wimfile:c:\install.wim /mountdir:c:\mount /index:1
With this other you can activate the feature and in the /source part, specify the desired featured
You can use a “deployed machine” or you can use the DVD source directory SXS
DISM /Image:C:\test /enable-feature /featurename:netfx3 /image:c:\Mount /all limitaccess /Source:”c:\windows\WinSxS”
4.The boot image (MDT INTEGRATION)
In default the X86 and X64 images are created by default on the SCCM installation , but in case needed this is the 0 conf that you will need for that process
Windows Preinstallation Environment (also known as Windows PE and WinPE) is a lightweight version of Windows used for the deployment of PCs, workstations, and servers, or troubleshooting an operating system while it is offline. It is intended to replace MS-DOSboot disks and can be booted via USB flash drive, PXE, iPXE,[2] CD-ROM, or hard disk. Traditionally used by large corporations and OEMs(to preinstall Windows client operating systems on PCs during manufacturing), it is now widely available free of charge via the Windows Automated Installation Kit (WAIK).
| Version | Description |
|---|---|
| 1.0 | The first release of Windows Preinstallation Environment |
| 1.1 | Built from Windows XP Professional with Service Pack 1 |
| 1.2 | Built from Windows Server 2003 family |
| 1.5 | Called Windows PE 2004; built from Windows XP Professional with Service Pack 2 |
| 1.6 | Called Windows PE 2005; built from Windows Server 2003 with Service Pack 1 |
| 2.0[6] | Built from the first edition of Windows Vista. This version differs from the other versions since it doesn’t need the disc to load all the files.[citation needed] This means that the download is now 992 MB in size instead of 60 MB from the previous versions. It’s possible to modify the default startup disc to have access to a few plug-ins like Windows Management Instrumentation, Windows Scripting Host, additional drivers and other 32-bit applications (or 64-bit applications for 64-bit versions). Other new features include the capability for a rewritable RAM disk since WinPE version 1.x only has a recordable RAM disk. |
| 2.1[7] | Built from Windows Server 2008 |
| 2.2 | Built from Windows Server 2008 SP2 |
| 3.0 | Built from Windows 7 code base. It is included in WAIK 2.0. |
| 3.1[8] | Built from Windows 7 SP1 code base. It is included in Windows Automated Installation Kit (AIK) Supplement for Windows 7 SP1 available from Microsoft’s website. |
| 4.0[9] | Built from Windows 8 code base. It is included in Windows ADK (Windows Kits 8.0) and available from Microsoft’s website. |
| 5.0[1] | Built from Windows 8.1 code base. It is included in Windows ADK (Windows Kits 8.1) and available from Microsoft’s website. |
| 5.1[1] | Windows ADK (Windows Kits 8.1 Update) includes 5.0 and user applies update 5.0 to 5.1 manually.[10] |
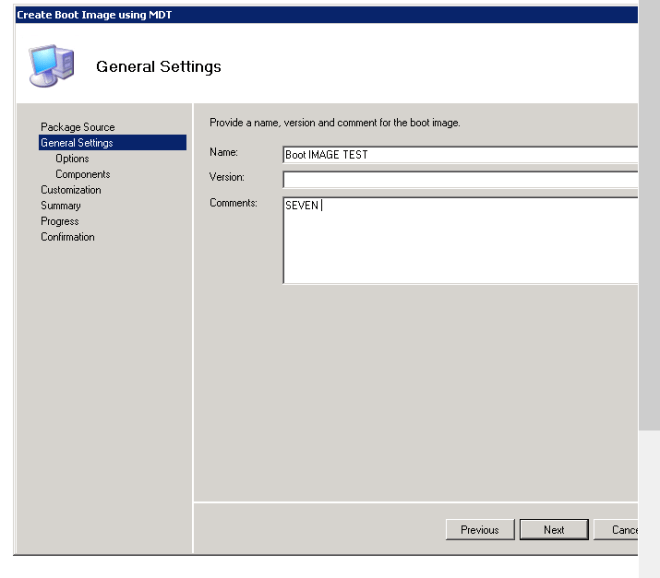
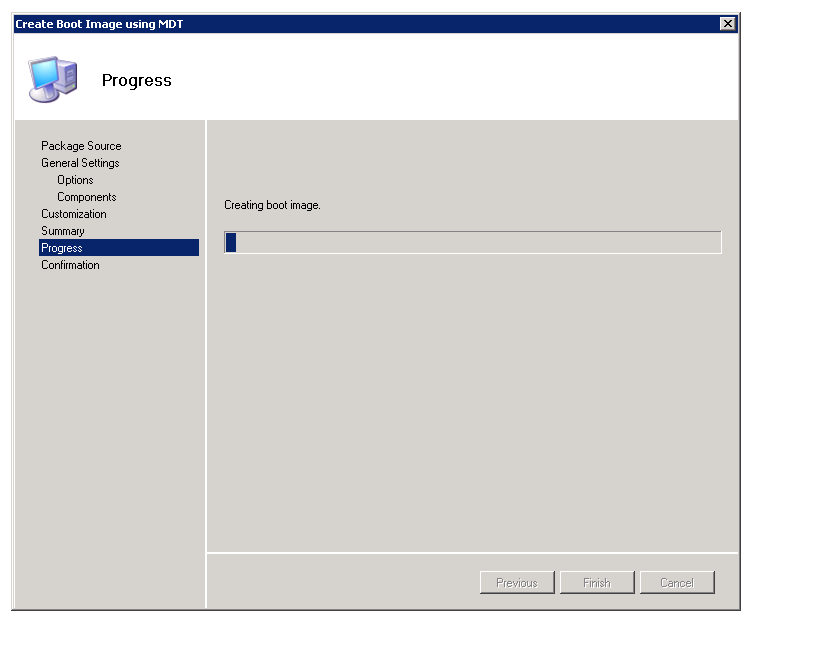
Go to the section boot Images , click on “create boot image using MDT “

Check name , version and comments
Select the desired platform and 128 scratch space ( our case is 64 bit )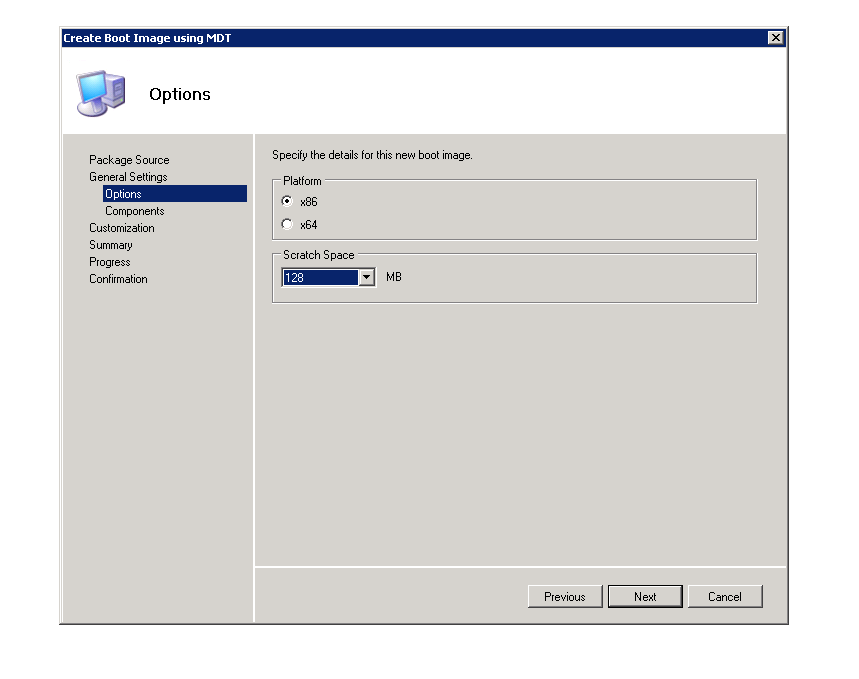
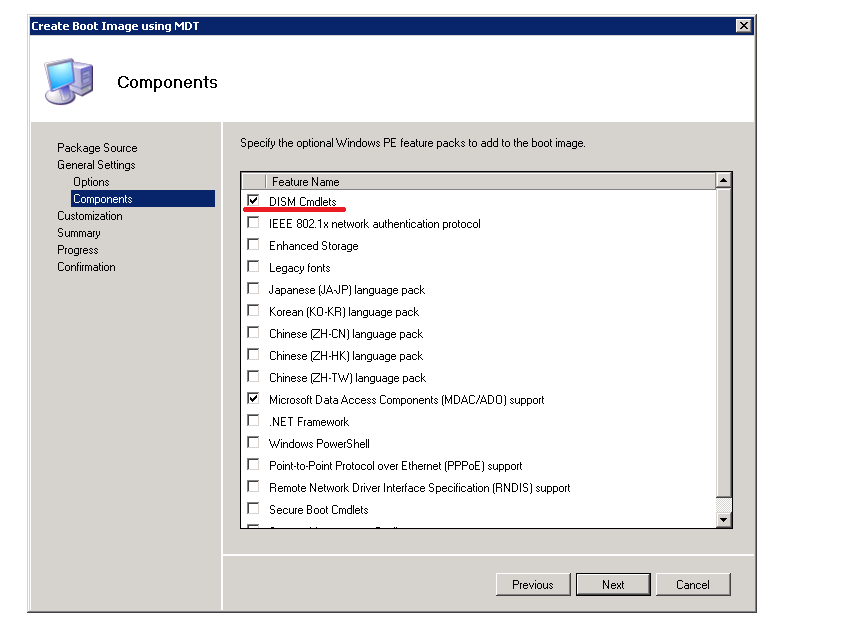
Select Dism cmdlets in components ( will be usefull )
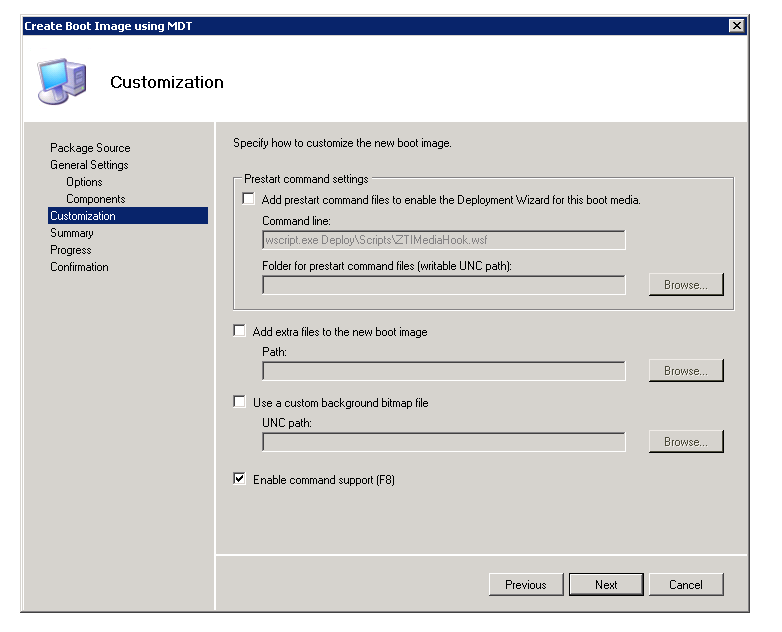
Check “enable command support F8 “ Will be useful too, it allows you to open CMD in a Operating System deployment Wpe Image
Click next and wait until the process is finished
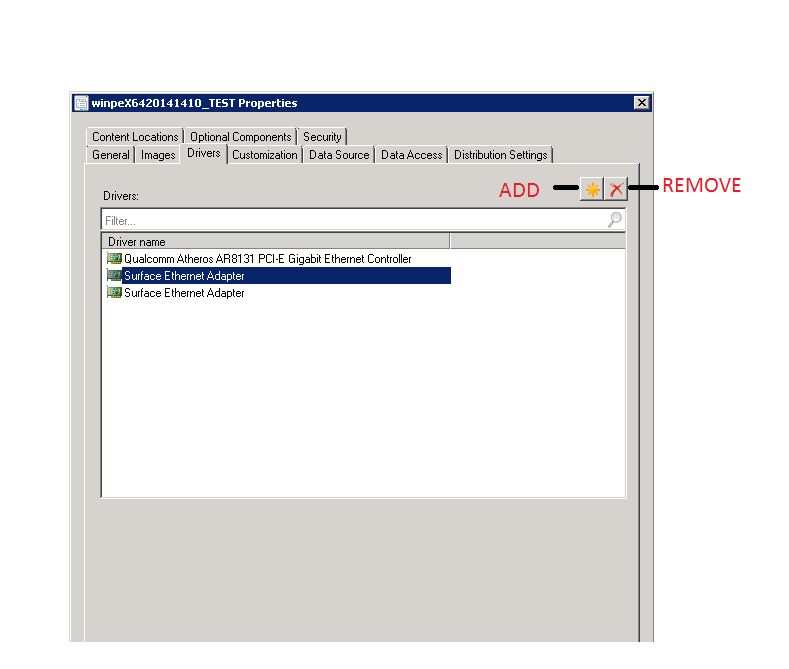
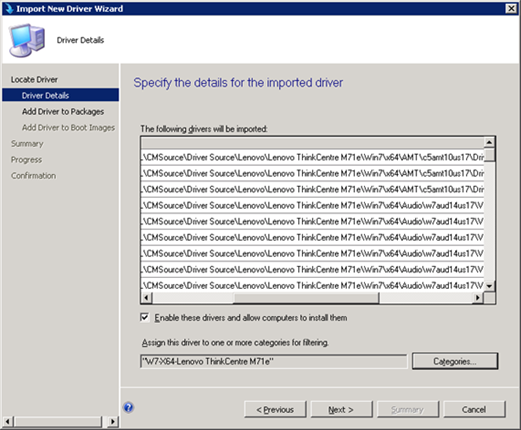
One action that will be needed will be add network drivers of a desired model because we need to boot this win pe image
To add a Network driver ( First you need to add to the sccm database using add drivers )
later will be available to the boot images
First click on properties of the image and go to drivers section , as you can see you can add and remove those network drivers
Select the desired driver to integrate on the image, and double click on it
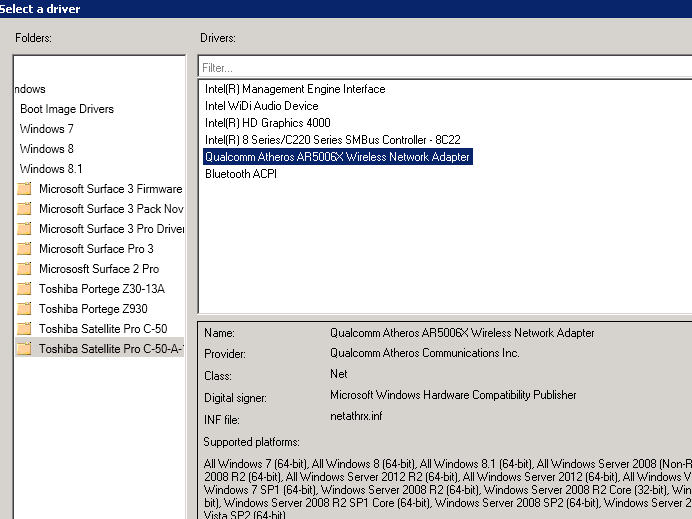
You will see the new driver on the list , then click OK , Wait until sccm completes the operation of adding the driver ( will take a wile )
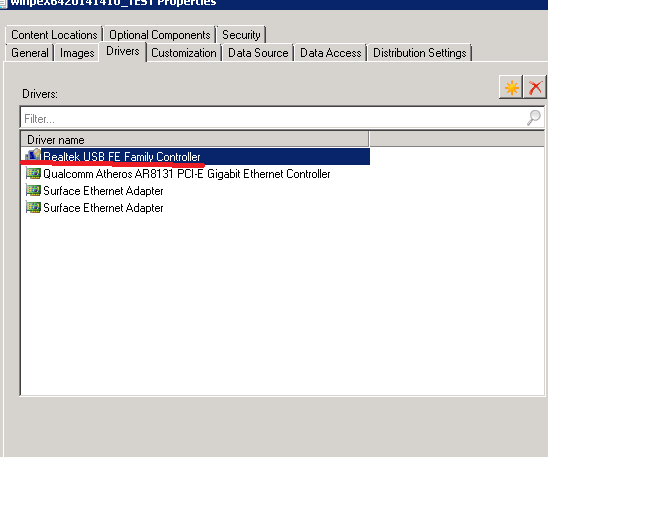
Wait until sccm completes the operation of adding the driver ( will take a while )
7. Configuring boot image parameters
The needed parameters to boot the images are 2
- Check this option on data source
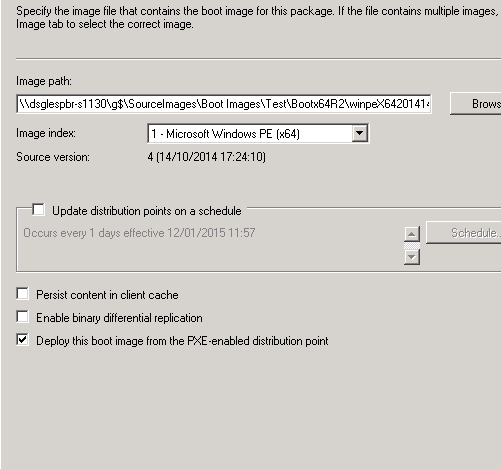
You will need to create 2 boot images ( x64 and x86 systems )
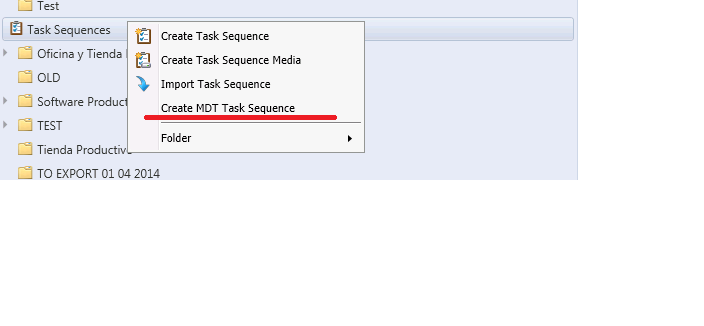
8.Create and customize MDT task sequence
To start we will need to Create the new task sequence , from the “task secuence section” . It will create 3 important parts that we gonna need ( are created as packages )
- MDT toolkit package: The Microsoft Deployment Toolkit (MDT) provides a unified collection of tools, processes, and guidance for automating desktop and server deployments. In addition to reducing deployment time and standardizing desktop and server images, MDT offers improved security and ongoing configuration management.
- USMT package: The User State Migration Tool (USMT) allows you to migrate user settings and data between computers during operating system deployment
- Settings: Includes unattend.xml and customsettings.xml
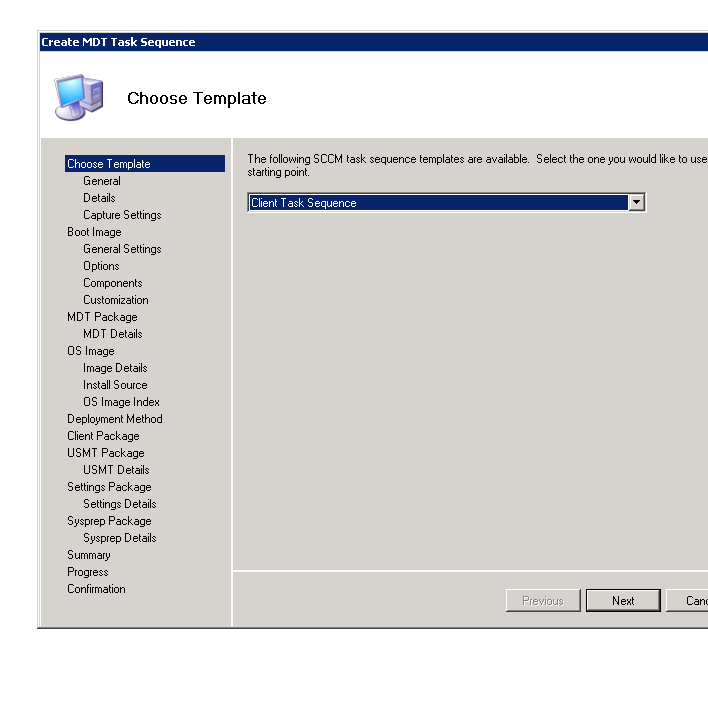
Creating MDT task sequence
Select “Client task sequence”
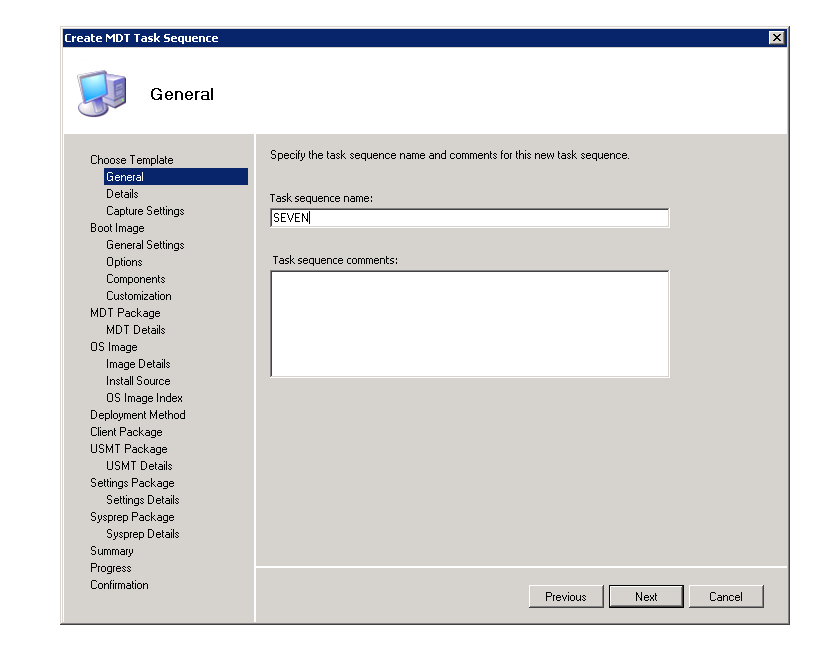
Select task sequence name
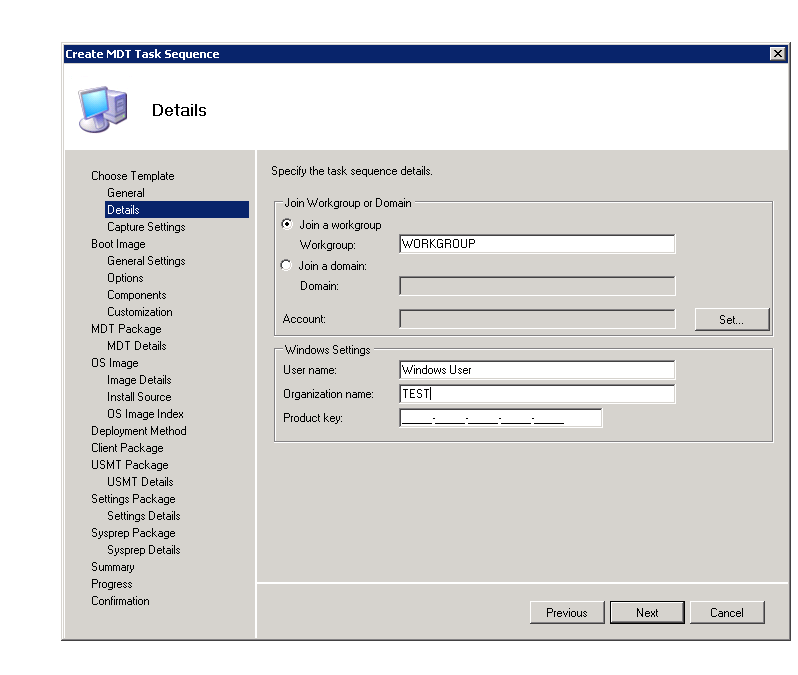
Leave this information ( in the future we will use MDT to complete it )
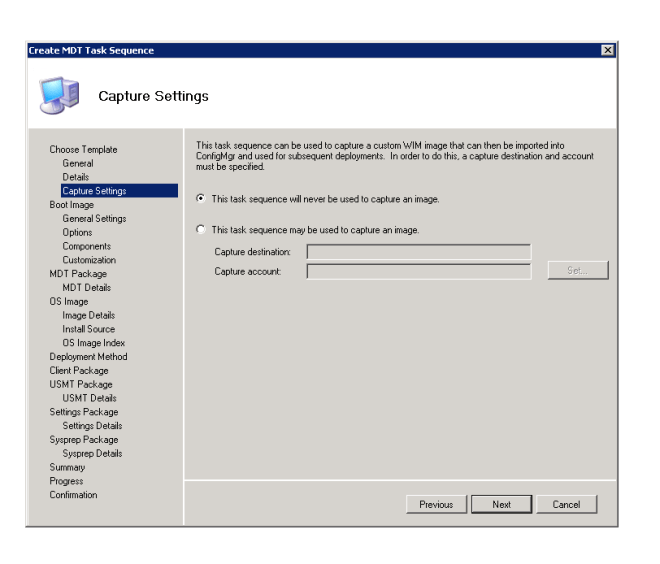
Select “ This task sequence will never be used to capture an image”
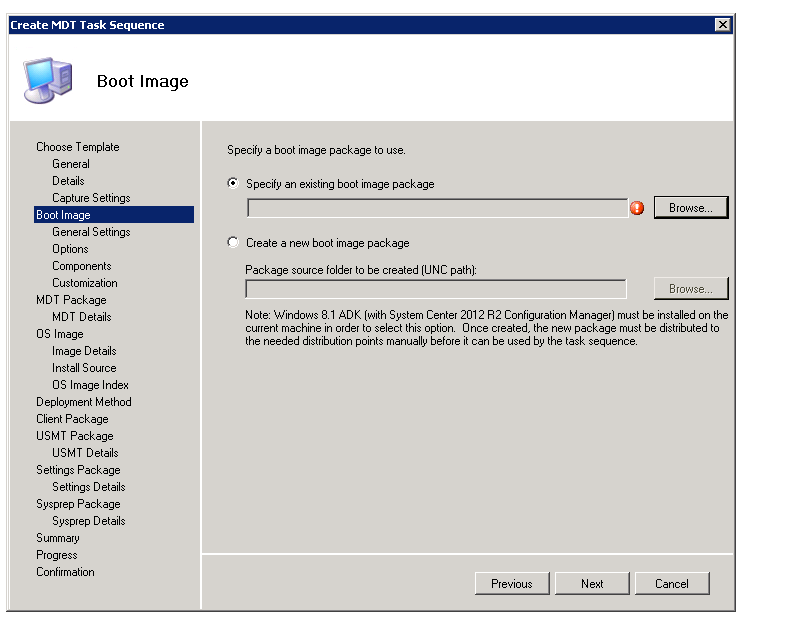
Specify the boot image that we created or the one you want to use , otherwise you can create a new one if you want
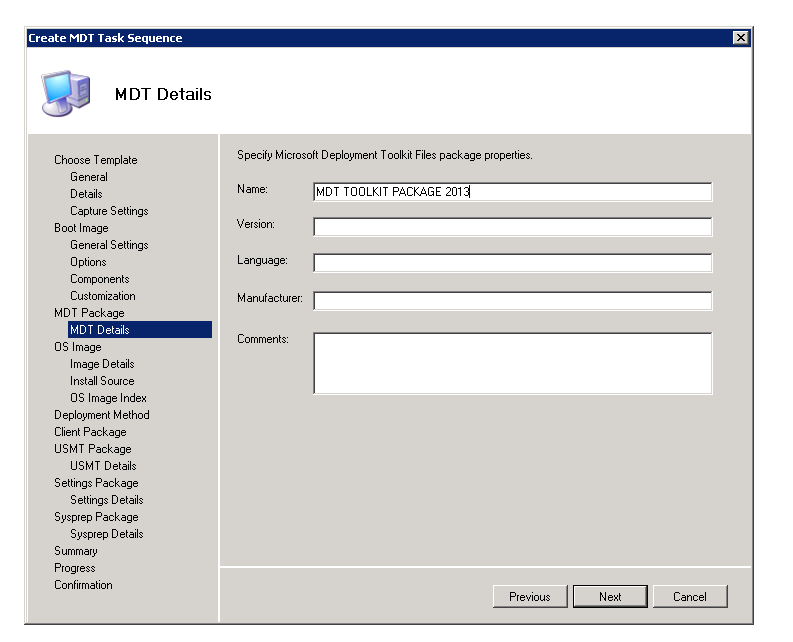
Next step : create the deployment toolkit , you must create something like that
\\yourserver\c$\MDT\Toolkit
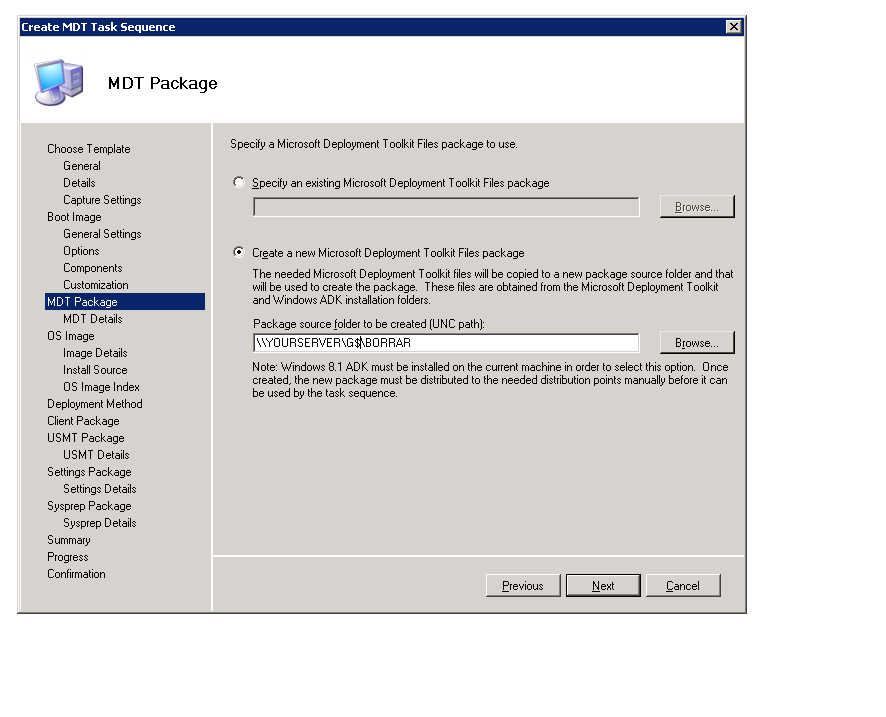
Enter the name of the toolkit
Specify the existing OS image ( that we created or select new one )

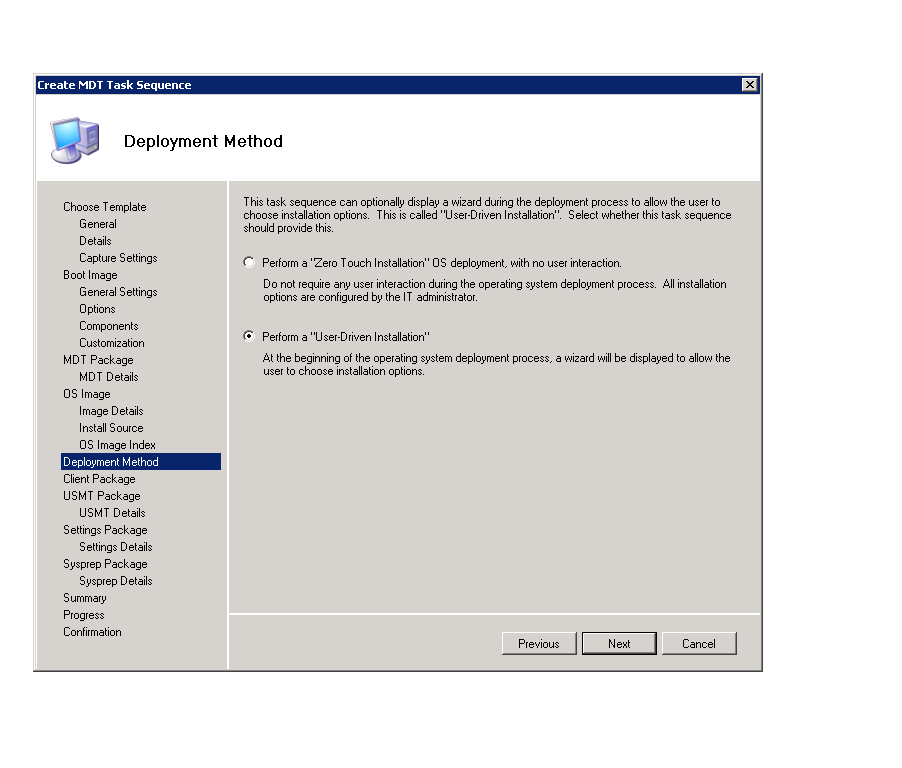
Select “perform a User-driven Installation “ ( )
Specify the configuration manager package ( this one is created by default with SCCM 2012 R2 installation site )

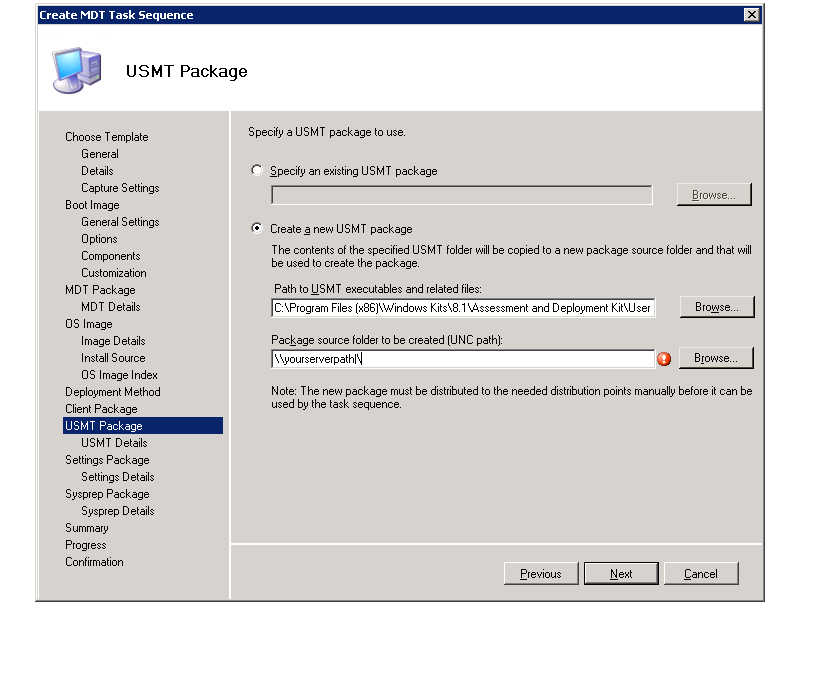
Create the USMT package ( used for migrating user’s data on deployments )
Use same folder structure as Mdt toolkit \\yourserver\MDT\USMTFOLDER
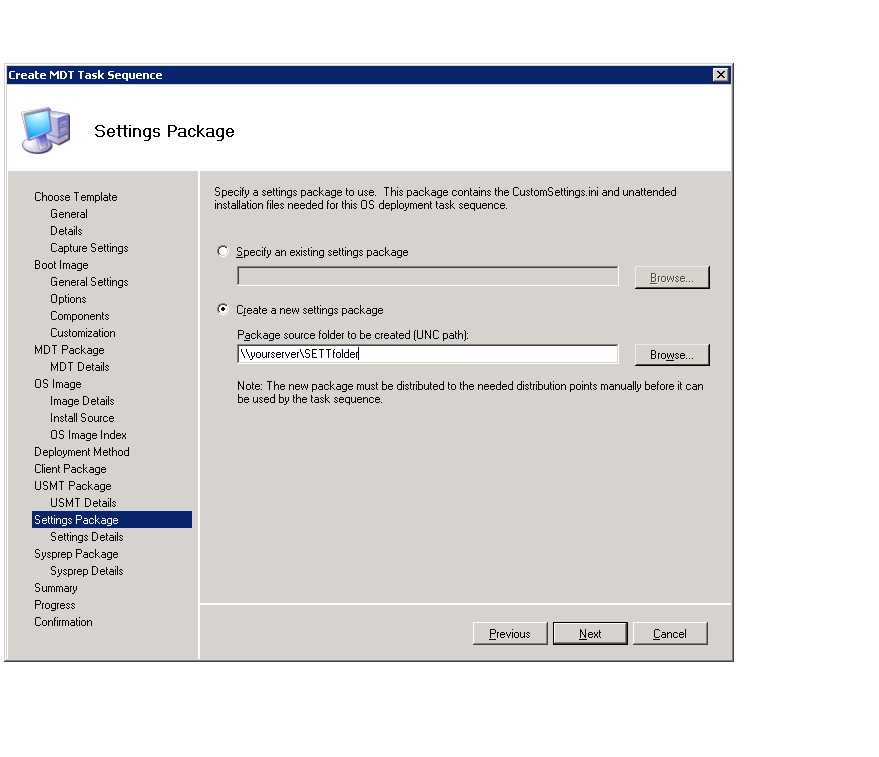
Create the settings package ( used for migrating user’s data on deployments )
Use same folder structure as Mdt toolkit \\yourserver\MDT\settpackage
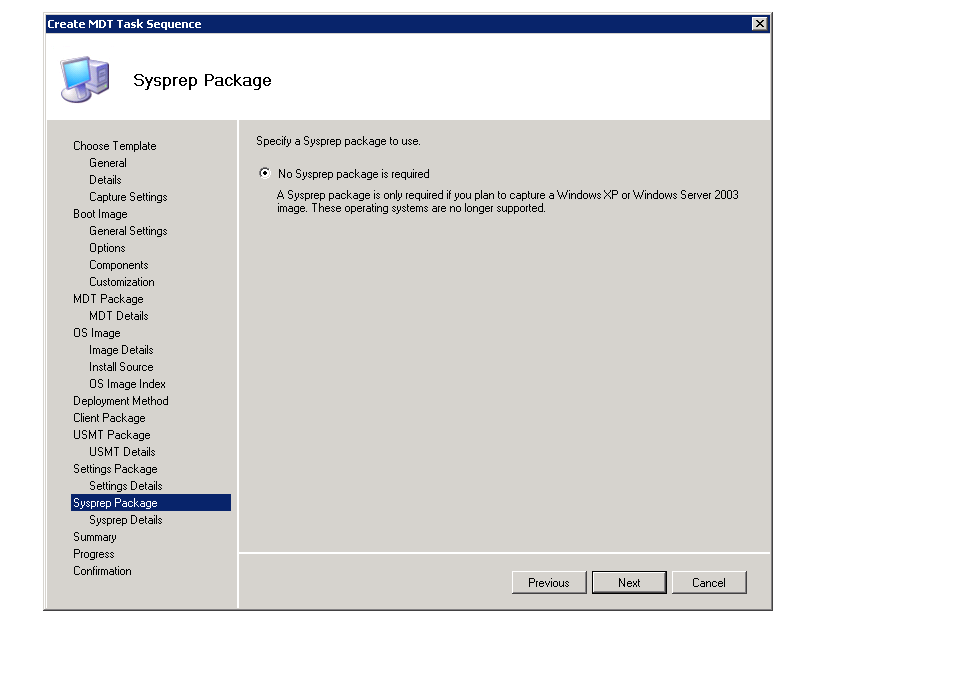
Select no sysprep package required
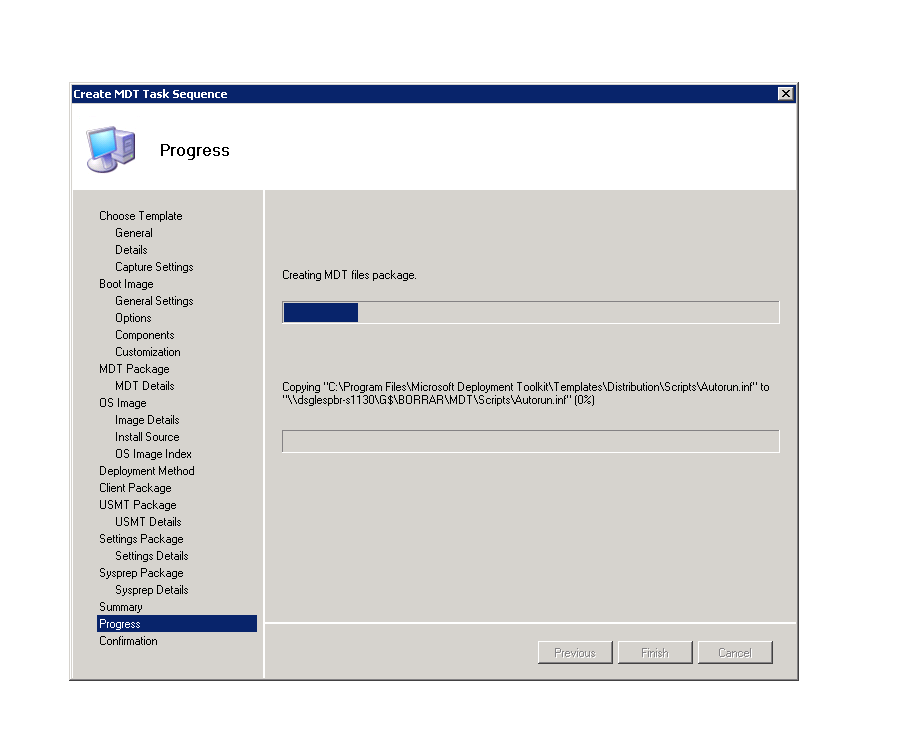
Click next and then finish and wait until the process is done , This will create the folders where you specified . To modify it you only need to go to these folders also will create 3 packages into SCCM2012 R2 with the link to this folders
Now you will need to Distribute the following packages to your distribution points to continue
(compliance must have 100 % of distribution )
“MDT toolkit”
“USMT package”
“SETTINGS PACKAGE”

This file is included in Settings package , can bypass some configurations of the MDT task sequence for example :
To modify IT or customize , go to the source of the package and edit the file .ini
You can specify the model by [] And customize screen resolution , logs and other many options

Some customsettings switches
Standard Switches:
OSInstall=YES/NO
SkipAdminPassword=YES/NO
SkipApplications=YES/NO
SkipAppsOnUpgrade=YES/NO
SkipBDDWelcome=YES/NO
SkipBitLocker=YES/NO
SkipCapture=YES/NO
SkipComputerName=YES/NO
SkipComputerBackup=YES/NO
SkipDeploymentType=YES/NO
DeploymentType=NEWCOMPUTER
SkipTaskSequence=YES/NO
TaskSequenceID=TaskIDNumber
SkipPackageDisplay=YES/NO
SkipProductKey=YES/NO
SkipSummary=YES/NO
SkipFinalSummary=YES/NO
Domain Membership Switches:
SkipDomainMembership=YES/NO
JoinDomain=EnterDomainName
DomainAdmin=Administrator
DomainAdminDomain=Domain
DomainAdminPassword=Pa$$w0rd
Language and Locale Switches:
SkipTimeZone=YES/NO
TimeZoneName=Eastern Standard Time
SkipLocaleSelection=YES/NO
KeyboardLocale=en-US
UserLocale=en-US
UILanguage=en-US
User Data Migration Switches:
SkipUserData=YES/NO
UserDataLocation=Auto Or UserDataLocation=NETWORK
UDShare=\\ServerName\MigData$
UDDir=%ComputerName%
Once you have made the changes in customsettings.ini remember to update the package on the distribution points , otherwise the changes will not be reflected on the Task Secuence process
This is the setup file xml that sysprep processes on a first deployment .
You can change the Language UI here by a variable or can specify the desired language and keyboard input

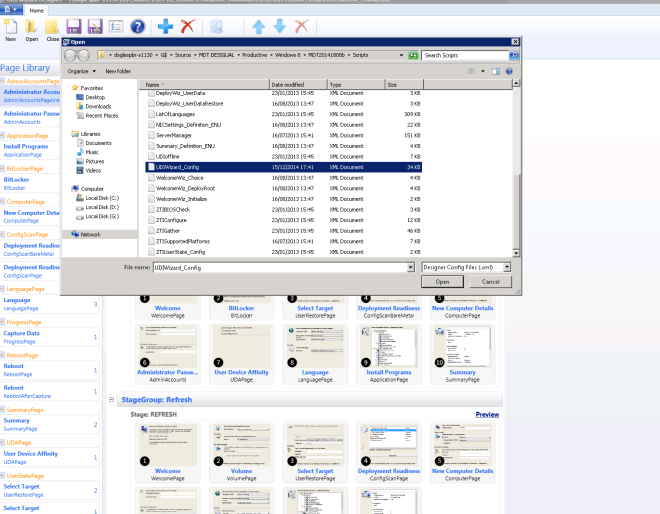
To make changes into our MDT , we need to modify the archive udiwizardconfig.xml with the program “Udi wizard” , its included into the MDT suite
Customize pages ( example on New Computer )
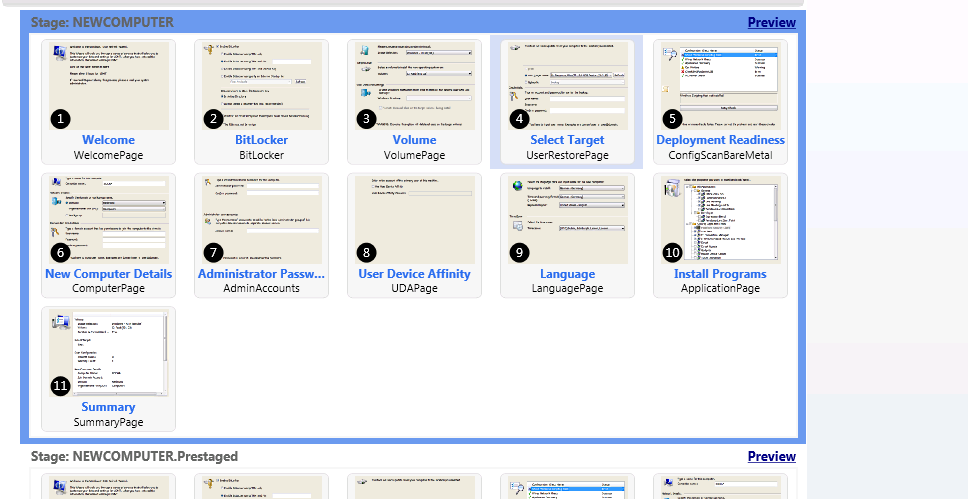
We leave only this 4 steps like this way
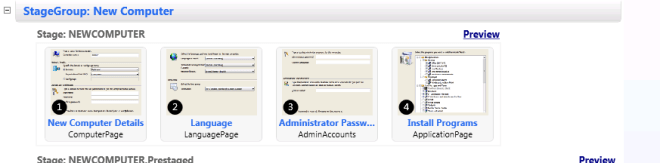
- Active directory ou selection , username and password ( must have delegation permission on the selected destination OUS )
- Language ( managed on task sequence by Settings )
- Install programs
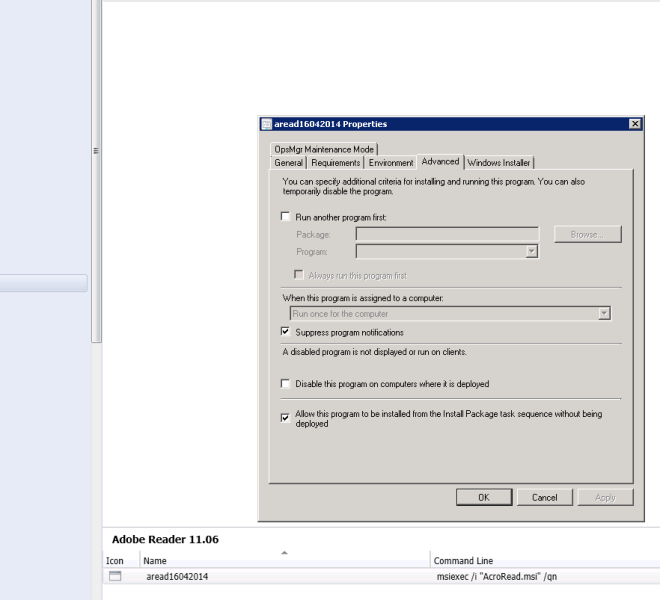
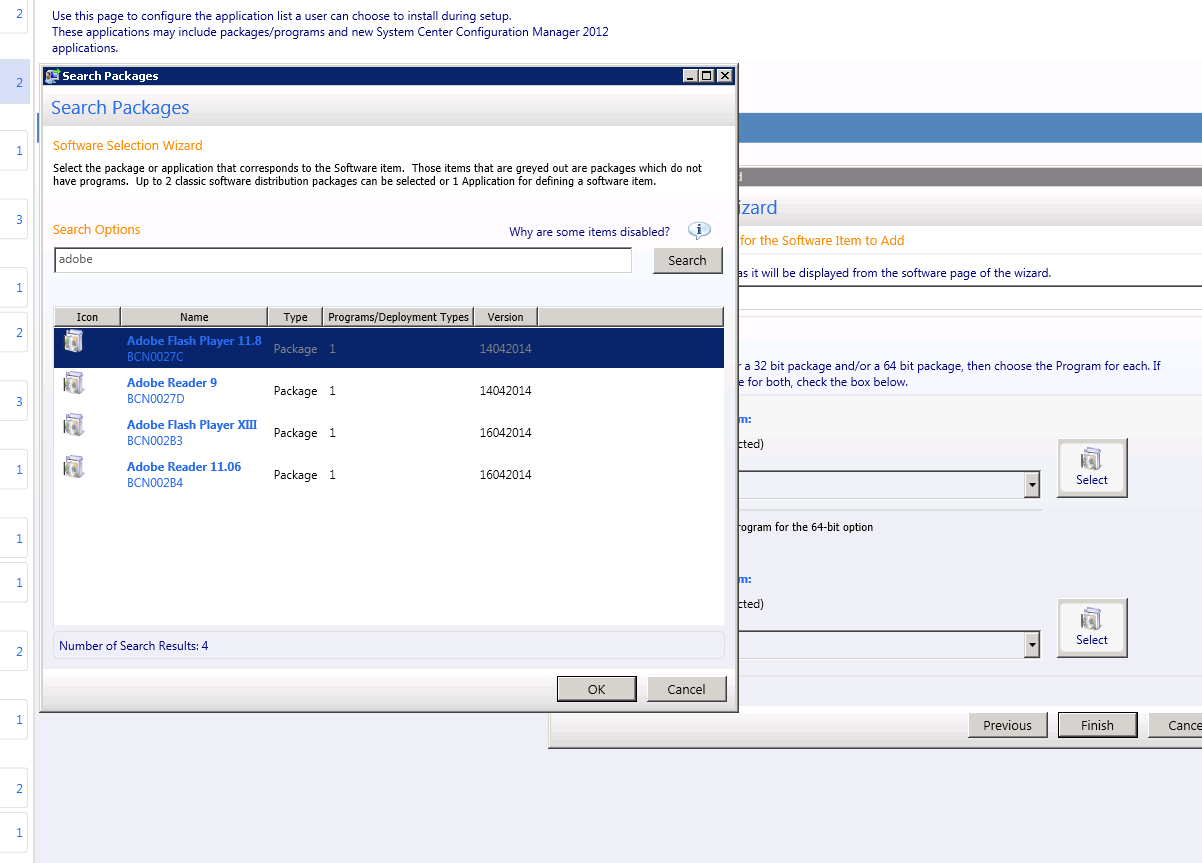
First we need is to create the software package , and check this option below , otherwise we wont be able to add the package into the Step list
“Allow this program to be installed from the install package task sequence without being deployed”
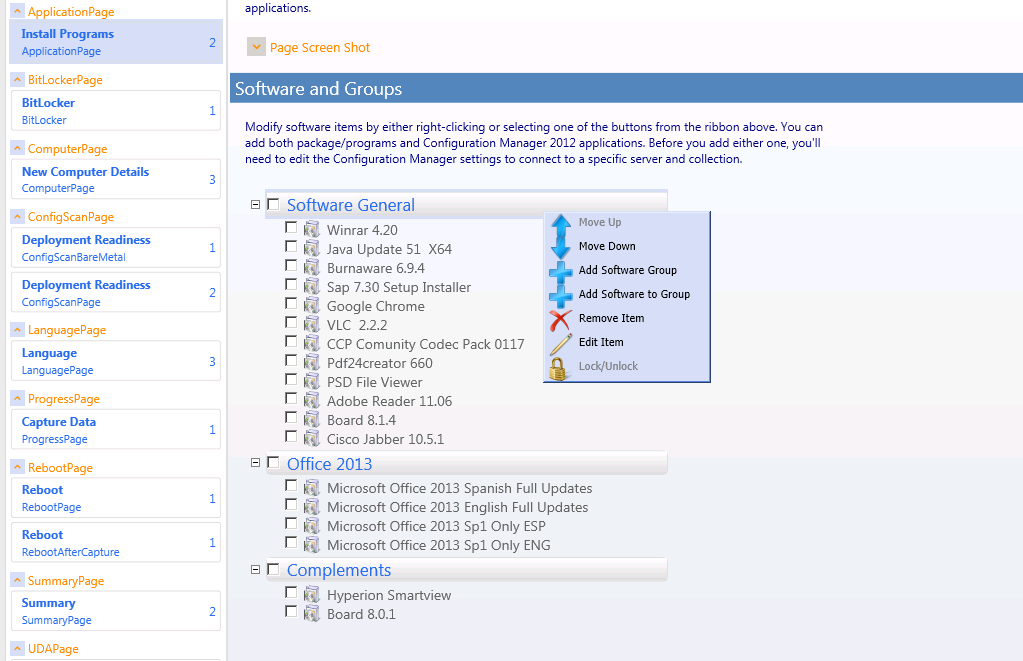
Then we select the page “Software and groups” and clicking “add software to group”
Click on I want to add package / program
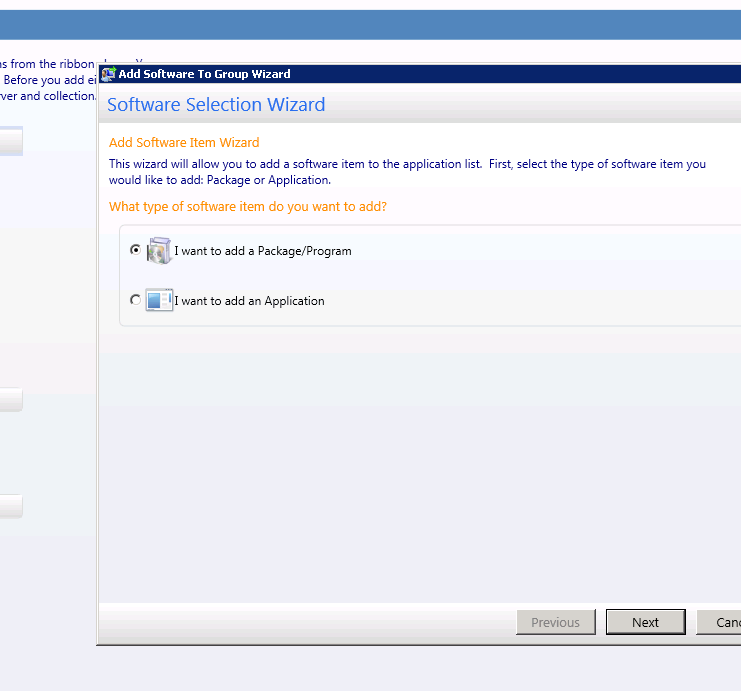
Select the package ( will appear in blue if you ckecked the option that we mentioned in the program properties )
The drivers since windows 7 kernels are stored at : C:\WINDOWS\System32\DriverStore\FileRepository , so first at all go to this folder on the reference machine
Steps
- Install manually the driver on the reference machine to “steal it” ( check the creation date of the folder nowbefore we install the driver and order it by last created folders )

Now we know that the last driver was created / installed on 04/08/2014 at 9:17
- We install the driver manually and WE WILL KNOW THAT THE NEXT DRIVERS /DRIVER ON THIS FOLDER WITH TODAYS DATE ARE THE WANTED ONES.
- Copy the new folders/folder from “filerepository” into a separate folder
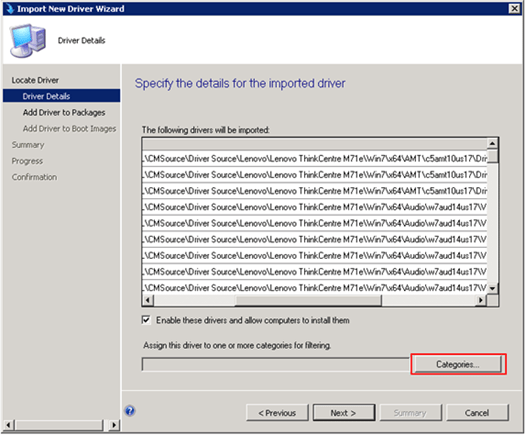
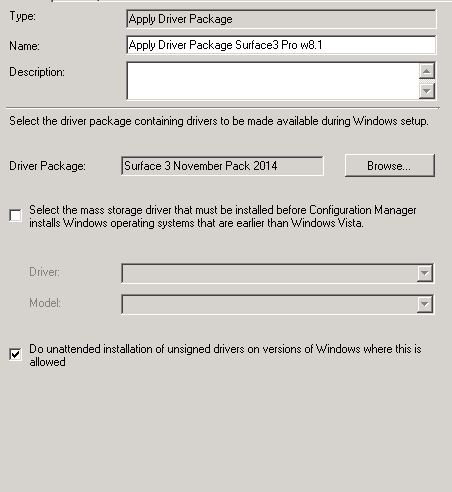
4. Add to sccm package driver
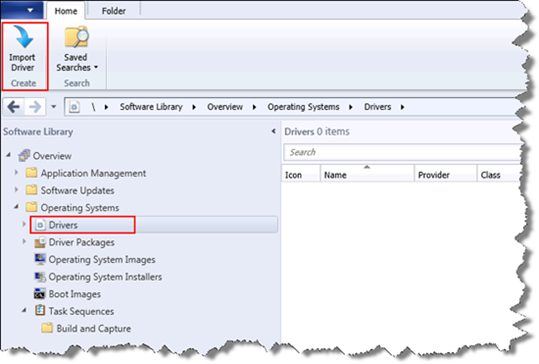
Select the folder where the drivers are located
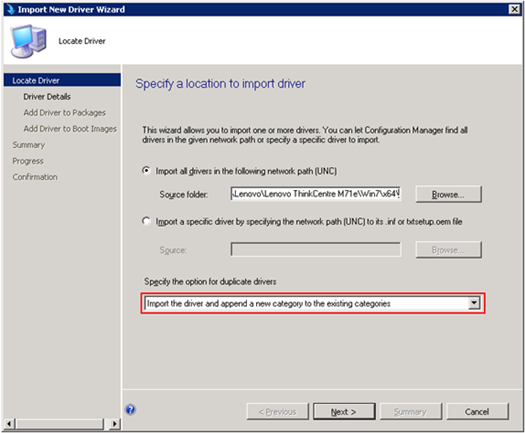
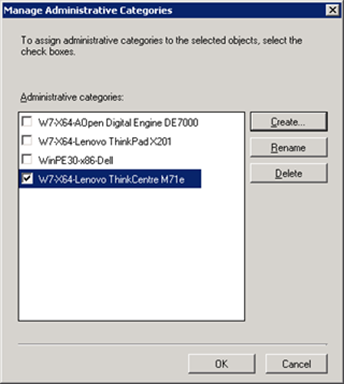
You can use Categories to separate the drivers
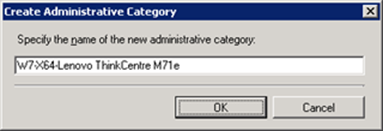

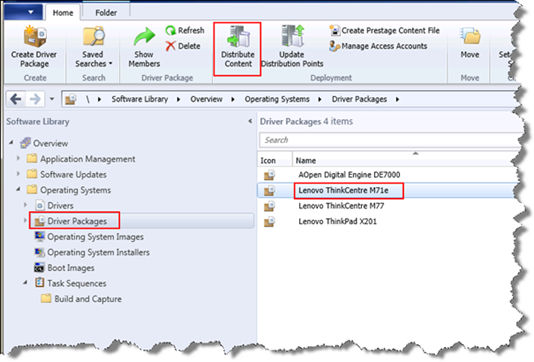
Now we create the driver package
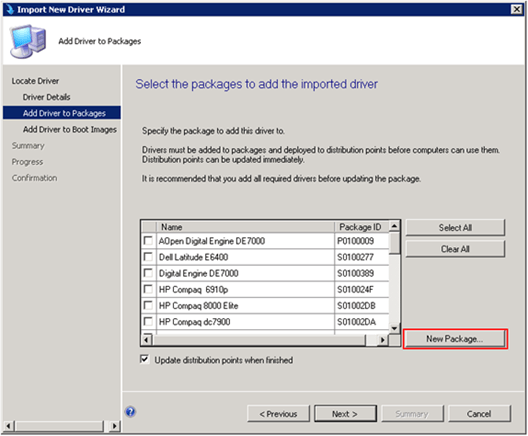
Specify the path where the package is stored 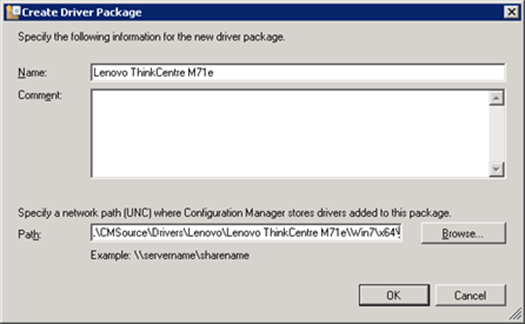
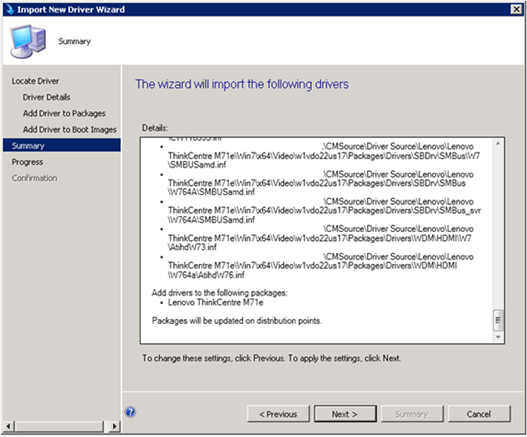
Distribute the package to the distribution points
Task sequence performances : Customize partition size
- Customize partition [Format and Partition Disk ]

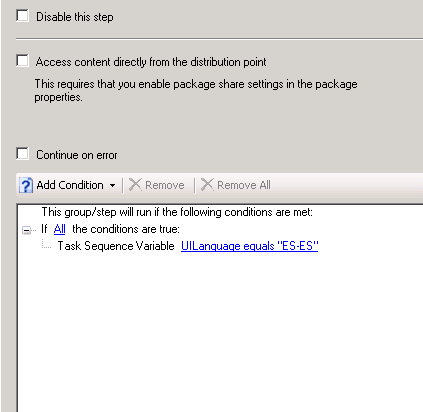
- Customize language [Apply Operating System Image] with variables parsing by mdt , we modify the settings ( we can create more than 1 settings with unattend.xml and customsettings.ini ,´ the Udi wizard configured language into the mdt toolkit parse the variable , and we use the Unnatend.xml that we have on the settings package

- Customize key [Apply Windows Settings ]
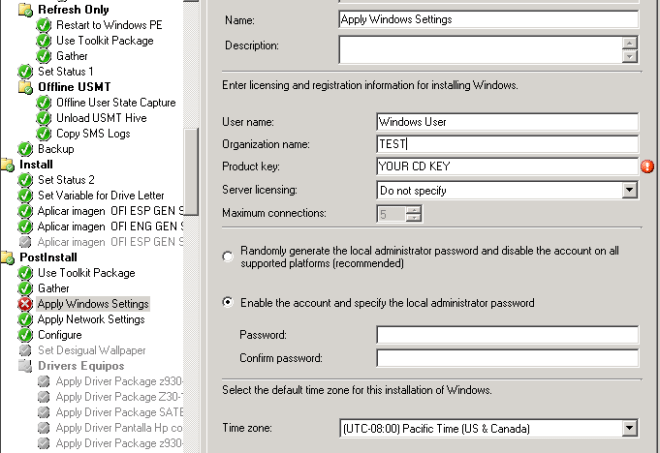
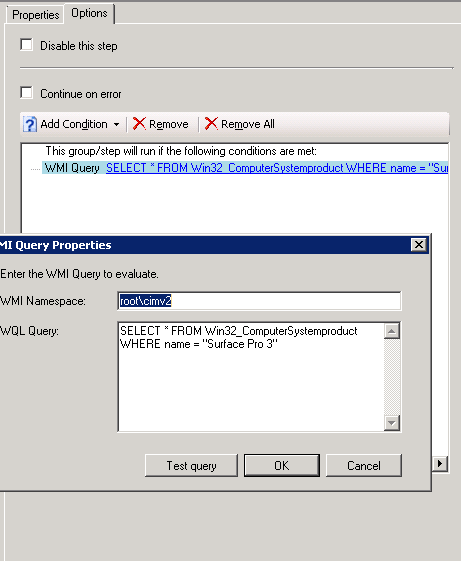
- Disable auto apply drivers and apply driver packages for specifyc models
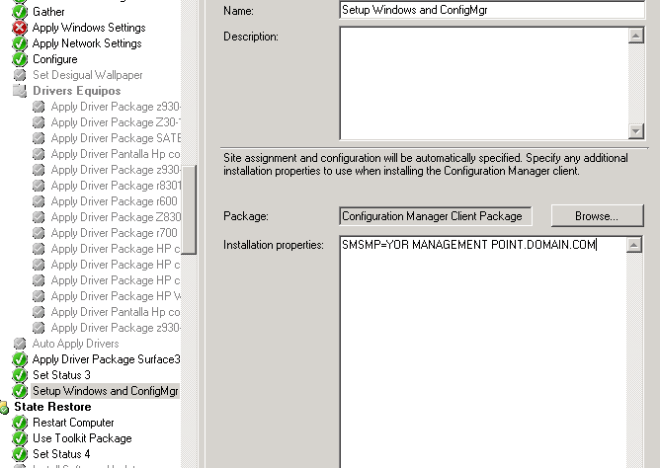
- Specify the management point before the client deployment ( FQDN required )
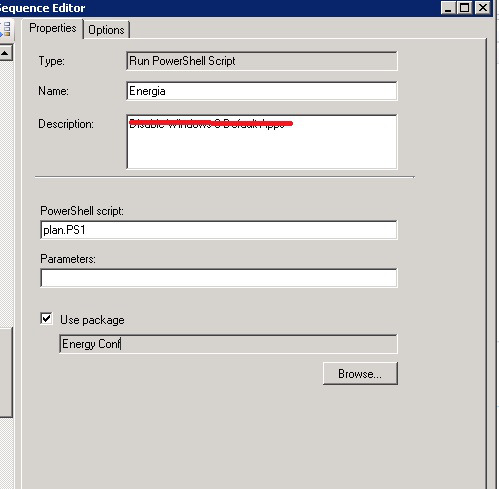
- Deploying Energy plan ( solves failures because sometimes the machine goes to suspend meanwhile the deployment is active )
This method works on the phase when the operating system image deployed runs on the machine when you usually deploy the online updates & software 🙂 , you must apply the option in the right place ( after “Use Toolkit Package” and “Set status4″
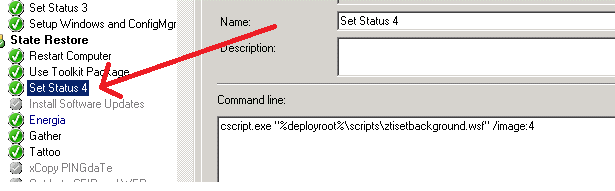
I had to make this because in our company we are deploying Surface 3 systems and other computers that gives to us problems with the “Install software phase” because sometimes the machine suspends during the process due to energy default plan included on WIMS of Windows 8.1 /7
Please take look at this post for this
Create the package using option “Run Powershell Script” on MDT
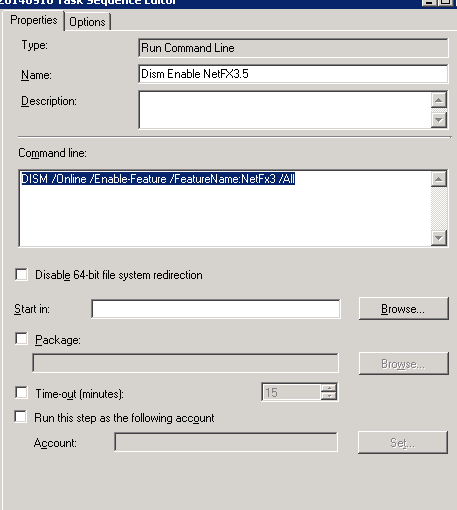
- Enable Framework 3.5 ( requires offline servicing into the image ) take look this post
- Remove windows 8.1 default apps
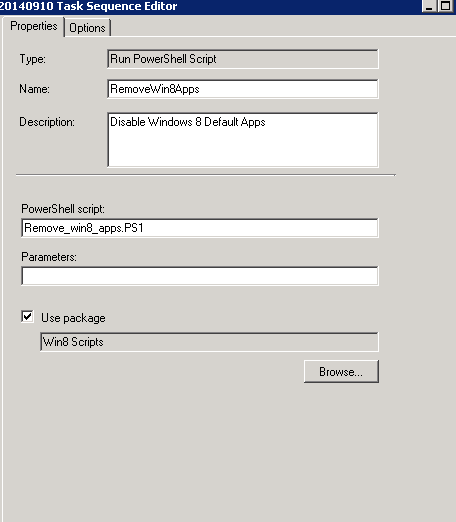
Runs the following powershell script to clean the default apps of a Windows Installation
—- BEGINING SCRIPT
$AppList = “Microsoft.BingFinance”,
“Microsoft.BingFoodAndDrink”,
“Microsoft.BingHealthAndFitness”,
“Microsoft.BingMaps”,
“Microsoft.BingNews”,
“Microsoft.BingSports”,
“Microsoft.BingTravel”,
“Microsoft.BingWeather”,
“Microsoft.HelpAndTips”,
“Microsoft.Reader”,
“Microsoft.SkypeApp”,
“Microsoft.WindowsAlarms”,
“Microsoft.WindowsCalculator”,
“microsoft.windowscommunicationsapps”,
“Microsoft.WindowsReadingList”,
“Microsoft.WindowsScan”,
“Microsoft.WindowsSoundRecorder”,
“Microsoft.XboxLIVEGames”,
“Microsoft.ZuneMusic”,
“Microsoft.ZuneVideo”,
“Microsoft.WindowsPhotos”
ForEach ($App in $AppList) {
$AppxPackage = Get-AppxProvisionedPackage -online | Where {$_.DisplayName -eq $App}
Remove-AppxProvisionedPackage -online -packagename ($AppxPackage.PackageName)
Remove-AppxPackage ($AppxPackage.PackageName)
}
—- END SCRIPT
- Remove First logon animation
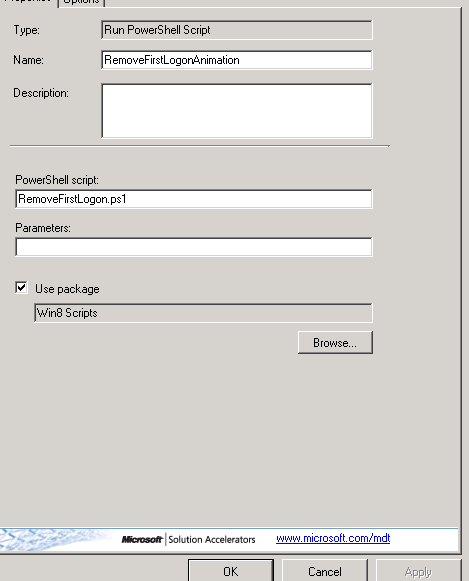
–BEGIN SCRIPT
# PowerShell New-ItemProperty Registry Value
Clear-Host
$RegPath = “HKLM:\Software\Microsoft\Windows\CurrentVersion\Policies\System”
New-ItemProperty -path $RegPath -Name EnableFirstLogonAnimation -PropertyType DWord -Value “0”
–END SCRIPT
— END OF THE GUIDE THANKS FOR READING
